As a manager in your organization, you need to monitor the Google Form responses in Salesforce that capture the contact information and other basic preferences when visiting customers fill out the form on your website. These responses are saved to a spreadsheet and used by your team to alert their contacts when new donation is received from them. Since it would be time consuming to manually get all the information from the spreadsheet into Salesforce, the following tools in both Salesforce and Google would be used.
Lightning Object Creator In Salesforce.
The Lightning Object Creator is one of the newest low-code app development tools on the Salesforce Lightning Platform. It allows any user to quickly turn spreadsheets—such as Google Sheets, Microsoft Excel, Quip Spreadsheets and comma-separated value (.csv) files – into modern, cloud-based apps.
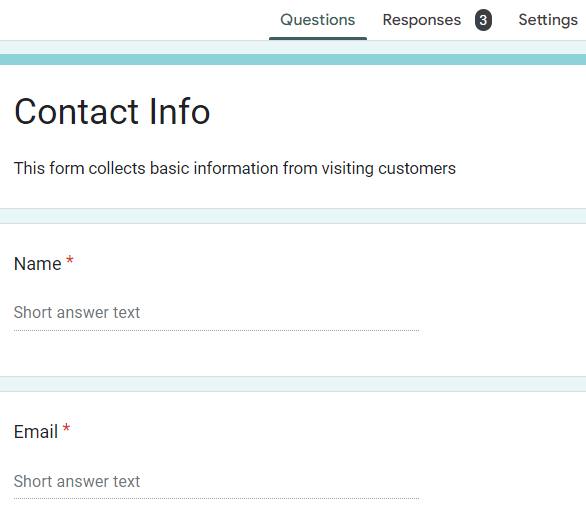
In this post, I will be using the Lightning Object creator to create a custom object from the Google form named “Contact Info” that I have already created
Looking at the top of this screenshot, there are 3 responses which I will open as Google sheet by clicking the Responses and then click the sheet icon like as it is in the screenshot below

When you click on the icon, there will be a pop up window like this
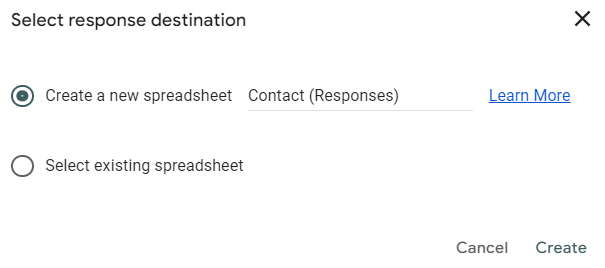
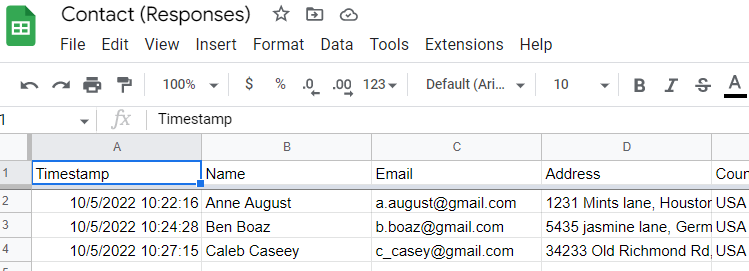
Leave the default, that is Create a new spreadsheet, then click Create. A spreadsheet showing the number of responses will be opened
Log In To Salesforce To Create a Custom Object Using This
You need to log in to Salesforce to create custom object using the above spreadsheet
Follow the steps below to create the custom object
1. Click the setup gear ![]() Setup icon and select Setup.
Setup icon and select Setup.
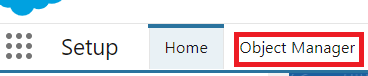
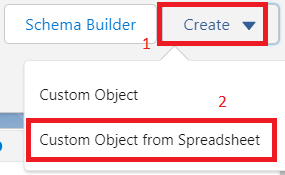
2. Click the Object Manager tab.
3. On the right hand side, click Create
4. Select Custom Object from Spreadsheet
5. Click Log in with Salesforce.
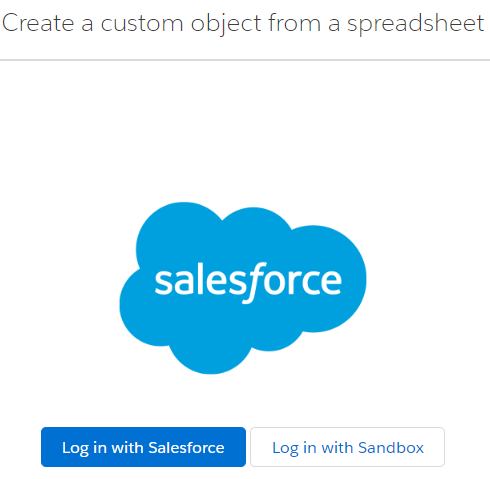
6. Enter your org’s username and password.
7. Click Log In.
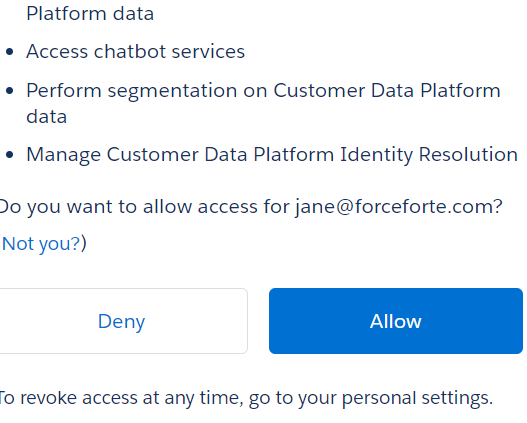
8. Click Allow.
9. Click Google Sheet (there are other 2 options).
10. Sign in with Google by choosing your email account where the form and its responses are located.
11. On the next window that appear, click Continue
12. Select the Spreadsheet and click Next

Map the Fields
13a. Map the Fields with the appropriate Salesforce Field Type
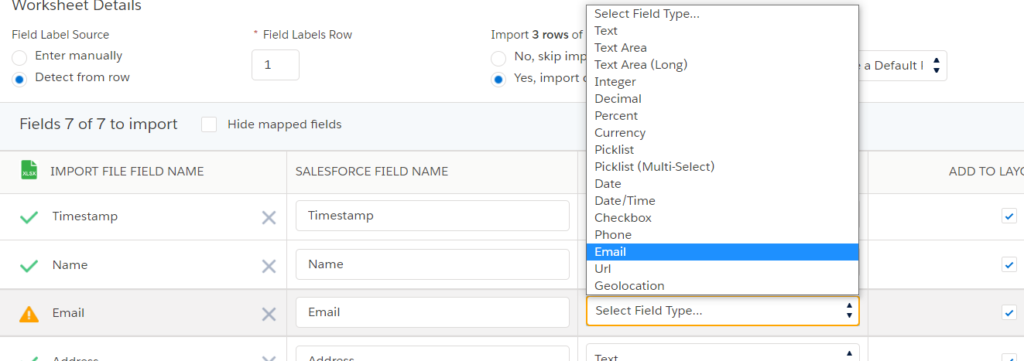
13b. Select Email
14. If you want to, Click the Preview icon  to see your data
15. Click Next.
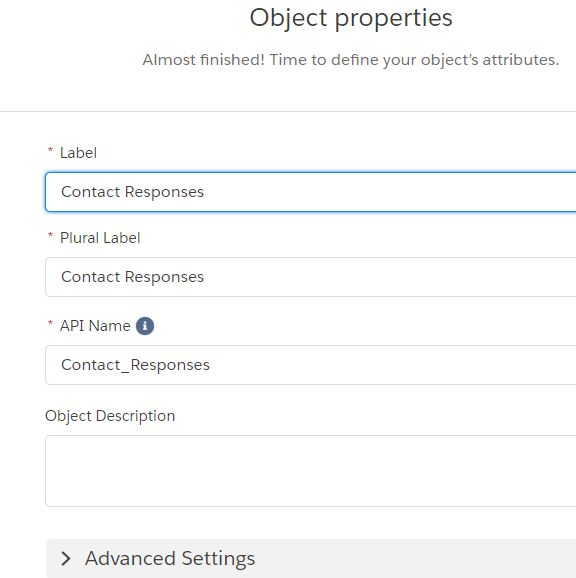
16. Change the Label to Contact Responses. Note the removal of the parentheses
17. Ensure API Name is Contact_Responses. Check the screenshot
18. Click Advanced Settings to expand the menu. Ensure all features are checked.
19. Click Finish.
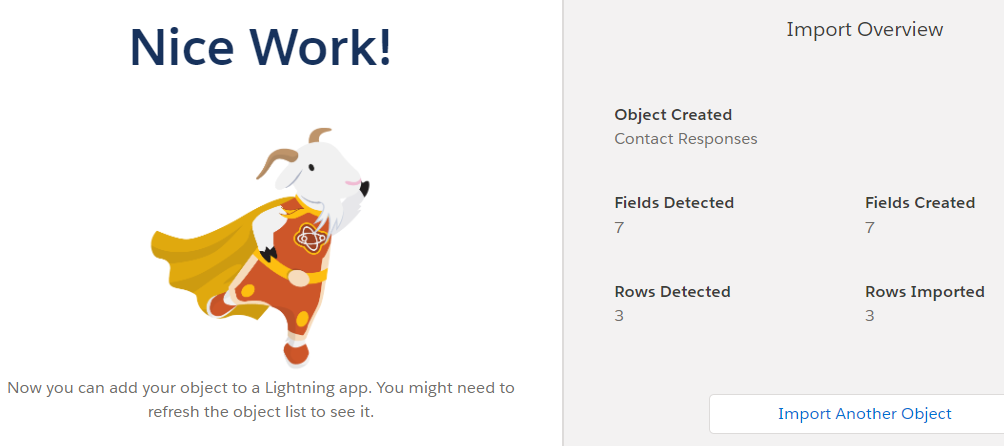
20. Once the “Nice Work!” screen appears like the screenshot below, then close the object creator tab.
21. However, if you get this type of message like this
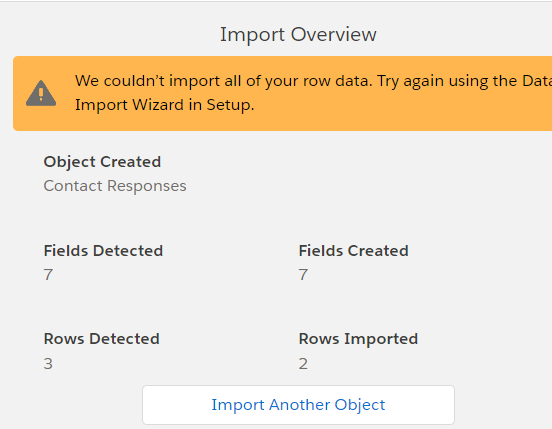
The object has been created but not all the rows are imported.
To get all the rows in Salesforce, check the part 2 of this blog post Using Salesforce Data Connector on Google Sheet.