Introduction
Visualforce is a markup language that allows you to describe the user interface components that live on your Force.com pages. It is the Force.com component-based user interface framework with automatic data bindings and API access to Salesforce. It uses the Model View Controller (MVC) pattern and allows developers to build sophisticated web applications and custom user interfaces, hosted natively on the Force.com platform.
Visualforce pages consist of two elements: Visualforce markup, and a controller. That is, you use markup language to define the components that will live on your page and tie it to a controller (either standard or custom) to execute the logic behind those components. Visualforce lives on the server. So any code you write will be generated and run on the server. Visualforce is extensible – developers can create their own components which enables them to extend Salesforce’s built-in features, replace them with new functionality, and build completely new apps. Visualforce supports the standard platform user interface, as well as a completely custom look and feel.
Visualforce pages are created by composing components, HTML, and optional styling elements. Visualforce can integrate with any standard web technology or JavaScript framework (e.g. JQuery, AngularJS) to allow for a more animated and rich user interface. Each page is accessible by a unique URL (as we will learn in this post). When a Visualforce page is accessed, the server performs data processing required by the page, renders the page into HTML, and returns the results to the browser for display. Click here.
Create a Visualforce page.
To create a Visualforce page in your Salesforce org.,
1. Turn on the Development Mode to enable an inline Visualforce Editor using either of the step below.
- From Setup in your org, enter Users in the Quick Find box, then
- Click Users | your name | Edit
- Enable Development Mode checkbox and Save.
OR
- Click your name, select My Settings, and enter Advanced in the Quick Find box,
- Then select Advanced User Details.
- Enable the Development Mode checkbox and Save.
2. Delete all the text in your Salesforce org.’s URL leaving your instance – https://your instance. Click here to see a sample. 3. Then add “/apex/name of your page without space” to the URL to get for example https:// your instance/apex/ MyFirstPage” and click Enter. 4. This will take you to a page where you will see “Visualforce Error” with an error message – Page nameOfYourPage does not exist like the one here 
5. Click the link prompting you to create the page. 6. This will direct you to the visualforce page you have just created with a default message congratulating you. 7. These are the changes you will see on the page: a) Congratulations This is your new Page: nameOfYourPage b) There will be a panel below the footer with the name of your page and two other icons to the right. 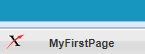

c)the first icon to the right represents the Development Mode and the second is an arrow 8. Click on the arrow to reveal the default code 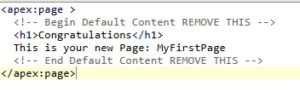 9. Congratulations, you have just created your Visualforce page. You can start adding other tags between the <apex:page> open and close tags